Colorbond fencing has actually acquired enormous popularity in the last few years, not just because of its aesthetic appeal however likewise for its toughness and low upkeep. If you're a beginner wanting to install a Colorbond fence, this comprehensive guide will stroll you through every step of the process-- from the initial planning phases to the last touches.
A Comprehensive Guide to Colorbond Fence Installation for Beginners
Installing a Colorbond fence can be an amazing DIY task or an expert venture that improves your property's value while supplying security and personal privacy. This guide aims to equip you with whatever you need to know about Colorbond fencing, including colors, profiles, setup time, benefits, upkeep suggestions, and whether you must take the do it yourself route or work with professionals.
Understanding Colorbond Fencing
What is Colorbond Fencing?
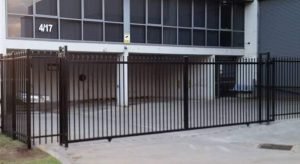
Colorbond fencing refers to a steel-based fence system covered with a baked-on enamel paint surface. This coating offers remarkable defense against weather elements and corrosion. The outcome is a lasting and appealing fencing option.
Colors Offered in Colorbond Fencing
Colorbond offers a substantial scheme of colors-- over 14 tones-- permitting property owners to select designs that match their architecture and landscaping. Some popular options consist of:
- Classic Cream Woodland Grey Ironstone Dune
With such variety, it's easy to discover a color that fits your visual vision!
Profiles: Picking the Right Style
The profiles of Colorbond fencing determine how the panels are developed and set up. Here are some typical profiles you might think about:
- Flat Top: Provides a tidy and modern look. Pale Eaves: Supplies a sophisticated touch. Raked Panels: Ideal for sloping terrains.
Each profile has its unique appeal and functionality.
Benefits of Setting up a Colorbond Fence
Durability That Lasts
One of the primary advantages of Colorbond fencing is its amazing toughness. Unlike wood fences that can rot or warp gradually, Colorbond fences resist termites and other pests.
Low Upkeep Requirement
Maintaining your Colorbond fence is as basic as occasional cleaning with water or moderate soap. You won't have to worry about sanding or repainting frequently like conventional wood fences.
Versatile Style Options
With numerous colors and profiles available, it's simple to customize your fence according to your style preferences.
Eco-Friendly Choice
Colorbond items are made from recyclable products, making them an environmentally responsible option for homeowners.
Preparing for Your Fence Installation Project
Assessing Your Residential or commercial property Needs
Before diving into setup, evaluate what kind of fence satisfies your requirements. Think about elements like personal privacy levels needed, style visual appeals, local council guidelines, and home lines.
Gathering Required Tools & Materials
Here's a list of tools you'll require for installing your Colorbond fence:
Measuring tape Level Post hole digger Hammer ScrewdriverAnd do not forget the vital products:
- Colorbond panels Steel posts Concrete mix (for protecting posts)
DIY vs Professional Setup: What's Best for You?
Advantages of DIY Installation
If you come in handy in the house improvement jobs, taking on this project yourself can conserve money on labor costs while providing you a sense of achievement as soon as completed.
When to Work with Professionals?
While DIY projects can be gratifying, some situations call for employing experts:

Consider all factors thoroughly before deciding which path suits you best!
Step-by-Step Guide to Putting up Your Colorbond Fence
Step 1: Planning Your Layout
First things initially-- plan where your fence will go! Measure the lengths required properly so you know the number of panels will be required.
Tip: Mark the design using stakes and string; this visual guide will assist keep everything directly throughout installation.
Step 2: Setting Up Posts
Dig holes for your steel posts at intervals defined by your chosen panel length (usually around 2-3 meters apart).
Post Hole Depth
The depth ought to normally have to do with one-third of the post height above ground level for stability.

Step 3: Putting Concrete Mix in Holes
Once holes are dug, place the posts in their particular holes before putting concrete around them to secure them strongly in place.
Setting Time
Allow concrete adequate time (generally 24 hr) to set before proceeding further.
Step 4: Attaching Panels
After posts are set up safely:
Align each panel in between two nearby posts. Secure them using proper screws or fasteners recommended by the manufacturer.Step 5: Last Touches & Cleansing Up
Finally, inspect your work! Guarantee whatever is lined up effectively before cleaning up any debris left over from installation.
Maintaining Your Colorbond Fence: Tips & Tricks
Although low-maintenance, regular maintenance extends its life-span significantly:
Clean with water regularly. Check for signs of rust or scratches; retouch as necessary. Trim back foliage that might rub versus panels over time.
By following these easy actions along with seasonal assessments every few months will keep your fence looking fresh!
FAQs about Colorbond Fence Installation
Q1: How long does it take to set up a Colorbond fence?
A1: Generally between one day to a number of days depending upon complexity and length-- time differs based on do it yourself versus professional work too!
Q2: Can I set up a Colorbond fence myself?
A2: Yes! Lots of homeowners effectively install their own fences if they feel comfortable doing so after thorough research.
Q3: Do I need council approval for my fence?
A3: Regulations vary by area; check regional council standards in advance regarding height constraints or permits needed!
Q4: Exist guarantees offered on Colorbond products?
A4: Yes! Most makers use warranties ranging from ten years up-wards depending on particular products used throughout installation.
Q5: Can I paint my existing wooden fence with color bond paint?
A5: While possible-- it's typically suggested changing old wood fencing instead of attempting painting due https://elliottatn509.trexgame.net/breaking-down-the-expenses-what-to-anticipate-when-setting-up-a-colorbond-fence concerns over adhesion durability problems down line!
Q6: What if I want more personal privacy? Can I add extra height?
A6: Before adding height speak with local regulations as there may be restrictions relating to optimum allowable heights in domestic areas!
Conclusion
In conclusion, starting the journey of installing a Colorbond fence can be incredibly fulfilling whether you pick the DIY path or employ expert help! Understanding colors and profiles keeps it trendy while keeping performance-- supplying security without sacrificing visual appeals!
Now that you have actually read this thorough guide tailored specifically for novices like yourself-- you're equipped with all essential understanding required going forward! Keep in mind-- the key lies not just in selecting products sensibly but likewise guaranteeing proper maintenance practices later keep everything looking beautiful over time! Delighted fencing!